CERAMICS JOURNAL
Jan 23, 2023—
It’s wild that my first ceramics class was in Feb 2022. There’s something really special in this process for me.

the happy place ◡̈
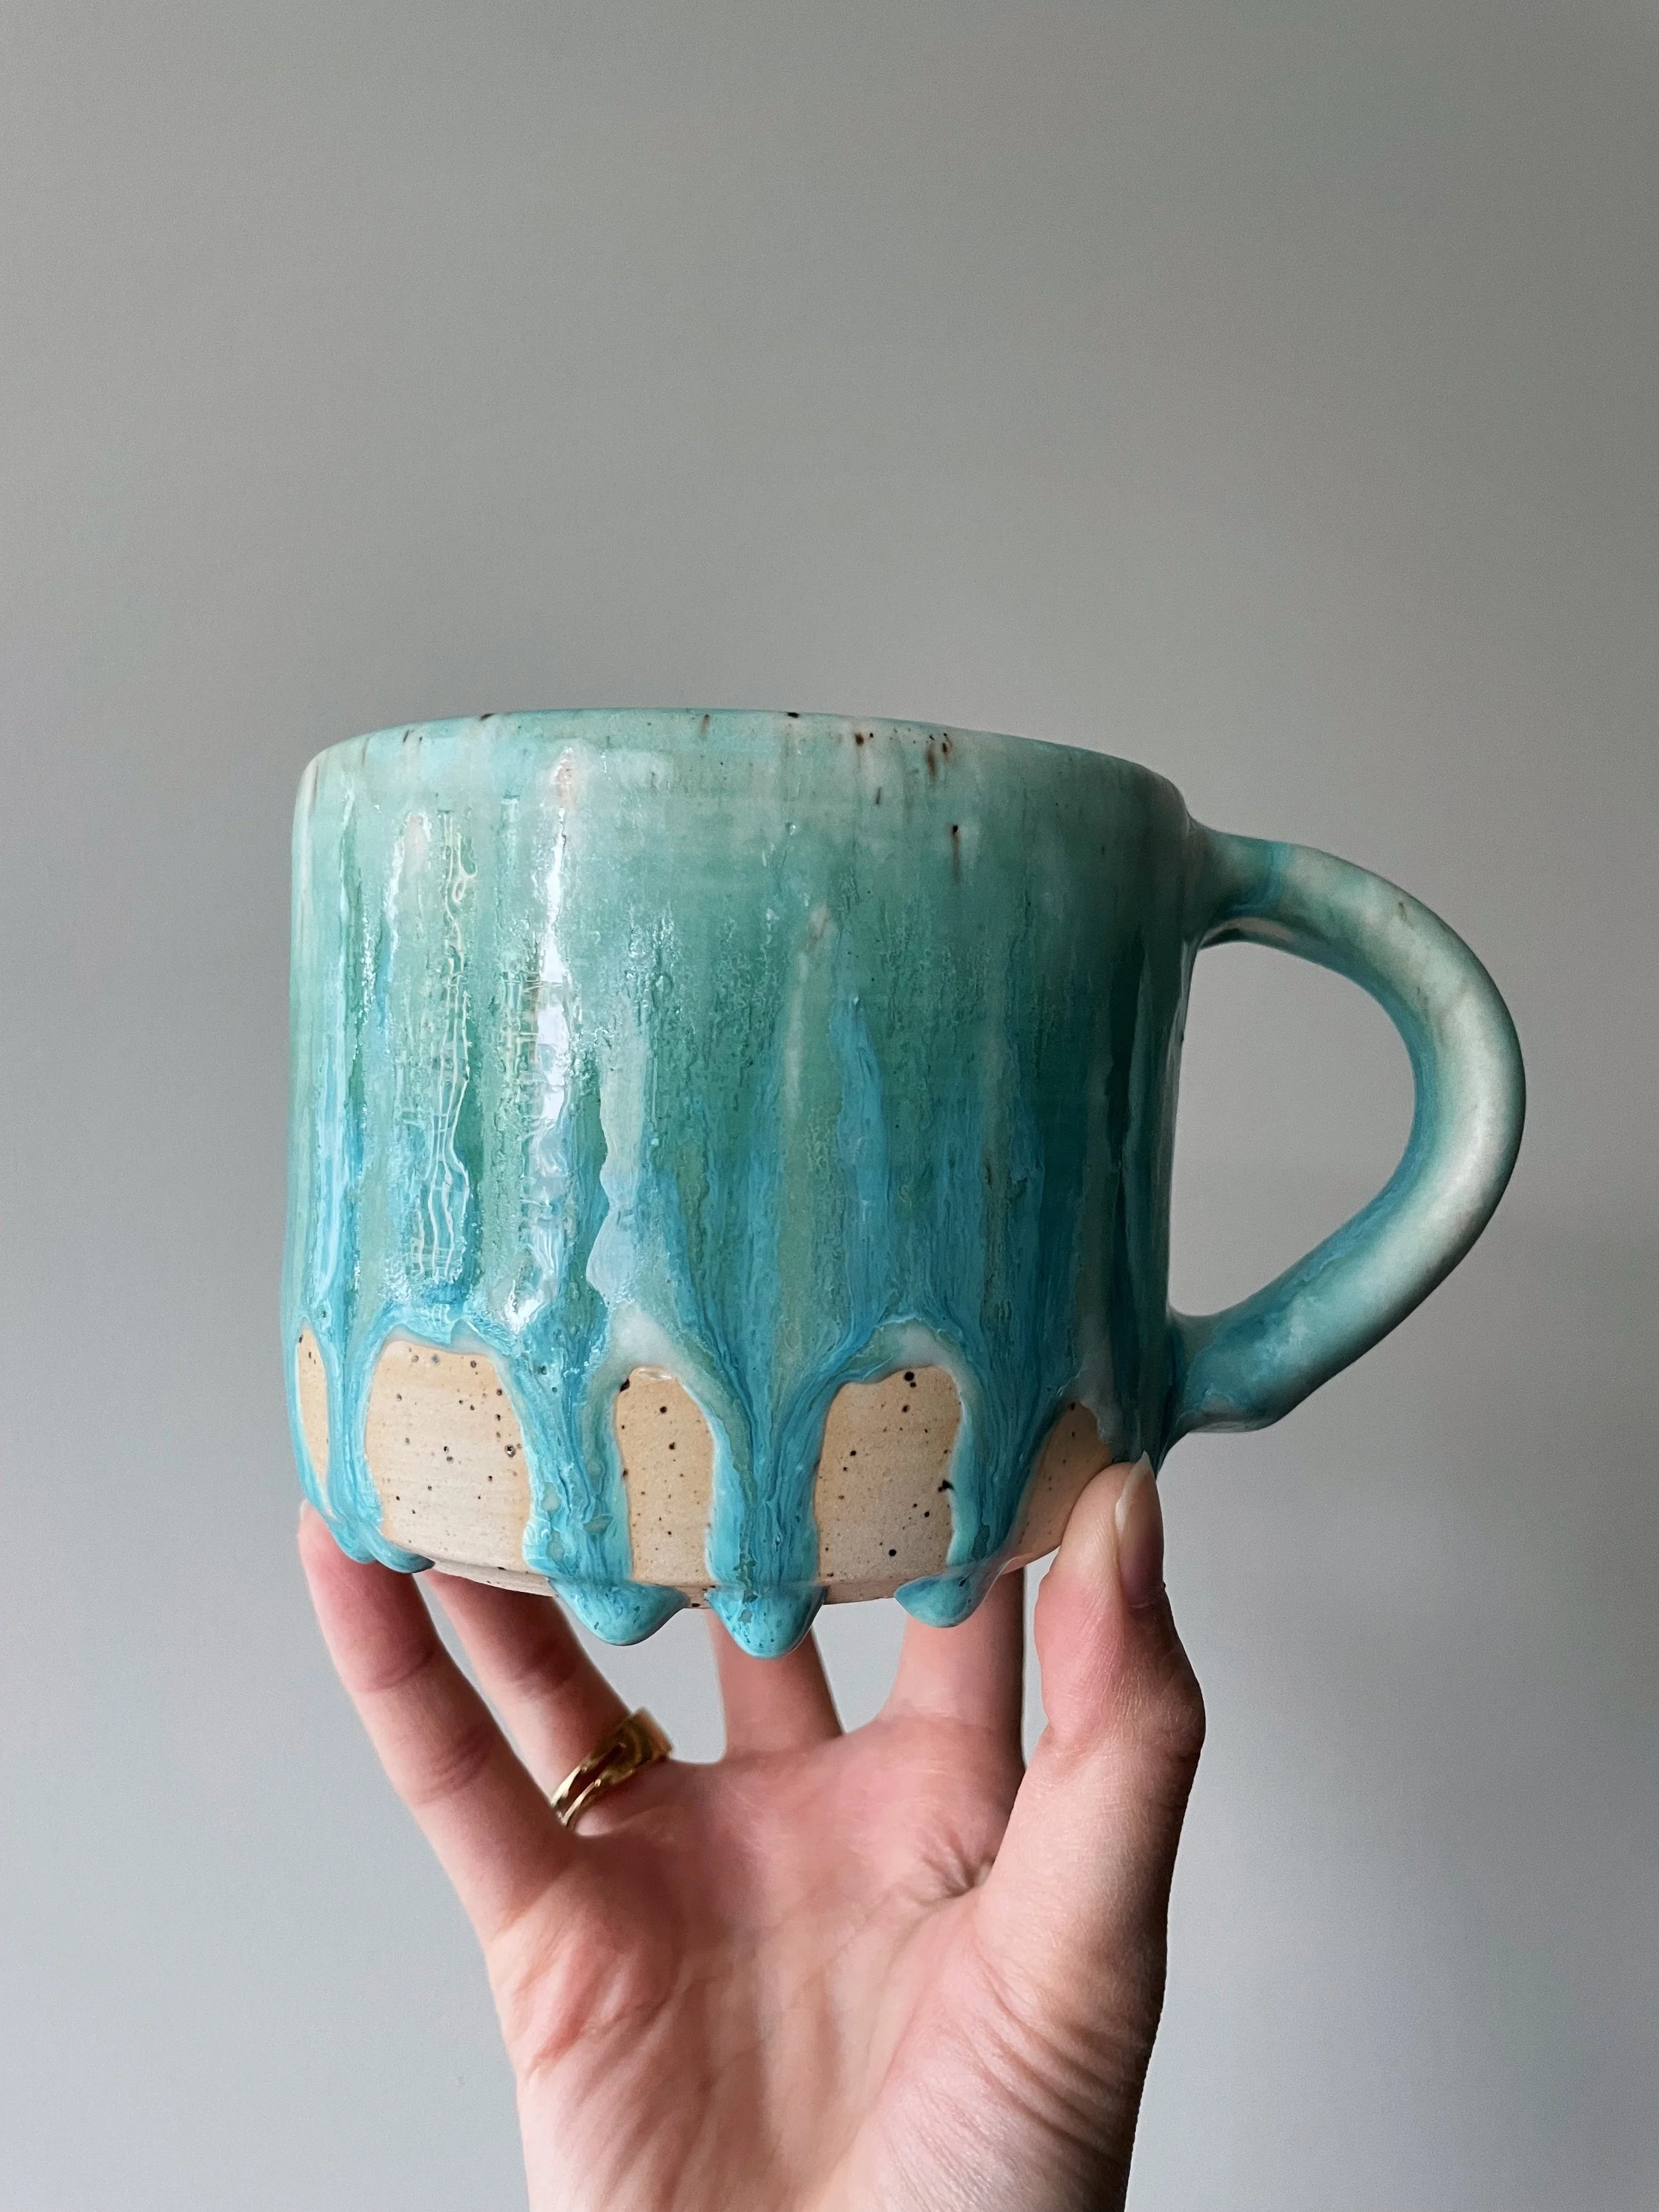
This is one of the first pieces I made. I loved experimenting with glazes and how these could add texture or uniqueness to a piece.

Feb 21, 2023—
TIL how to spiral wedge clay. This technique is useful for wedging larger lumps of clay compared to the usual rams head technique that I use.
Tip: use your body to wedge the clay instead of just your arms.
Also— putting clay on a piece of plaster or shaping it into a standing rainbow helps dry out the clay (don’t ask me about the latter, I’m not sure I understand why that works).

Feb 26, 2023—
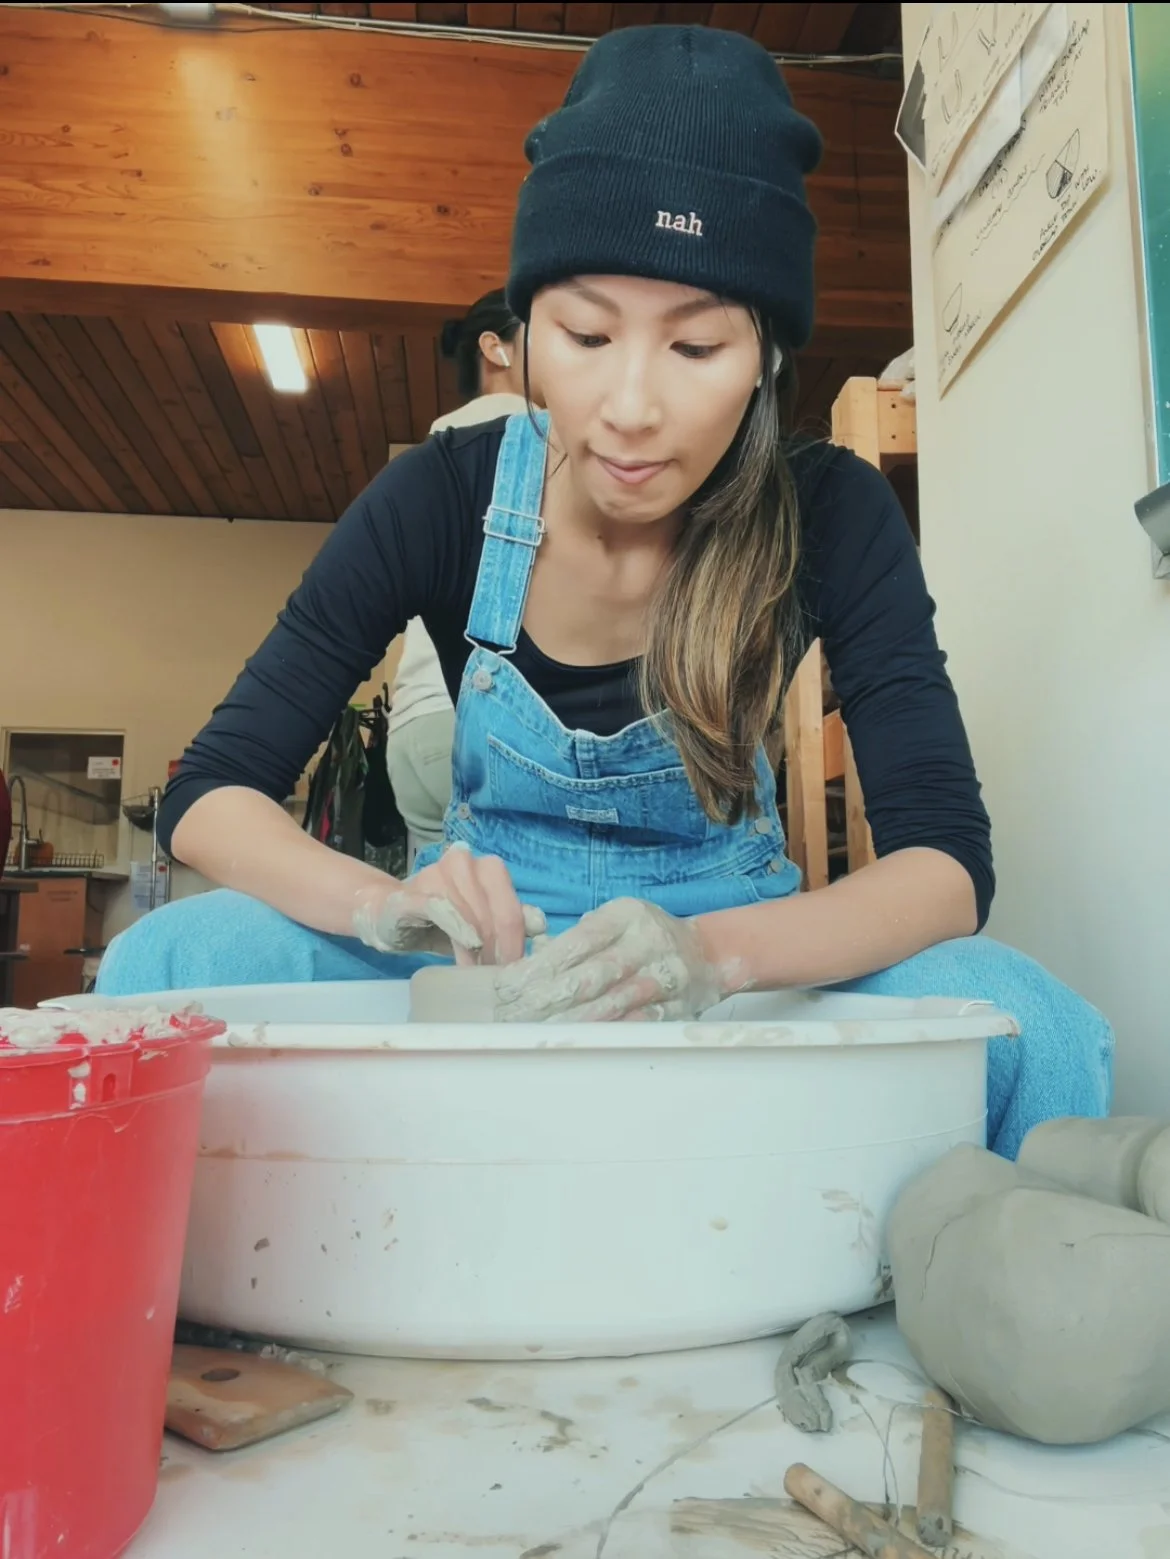
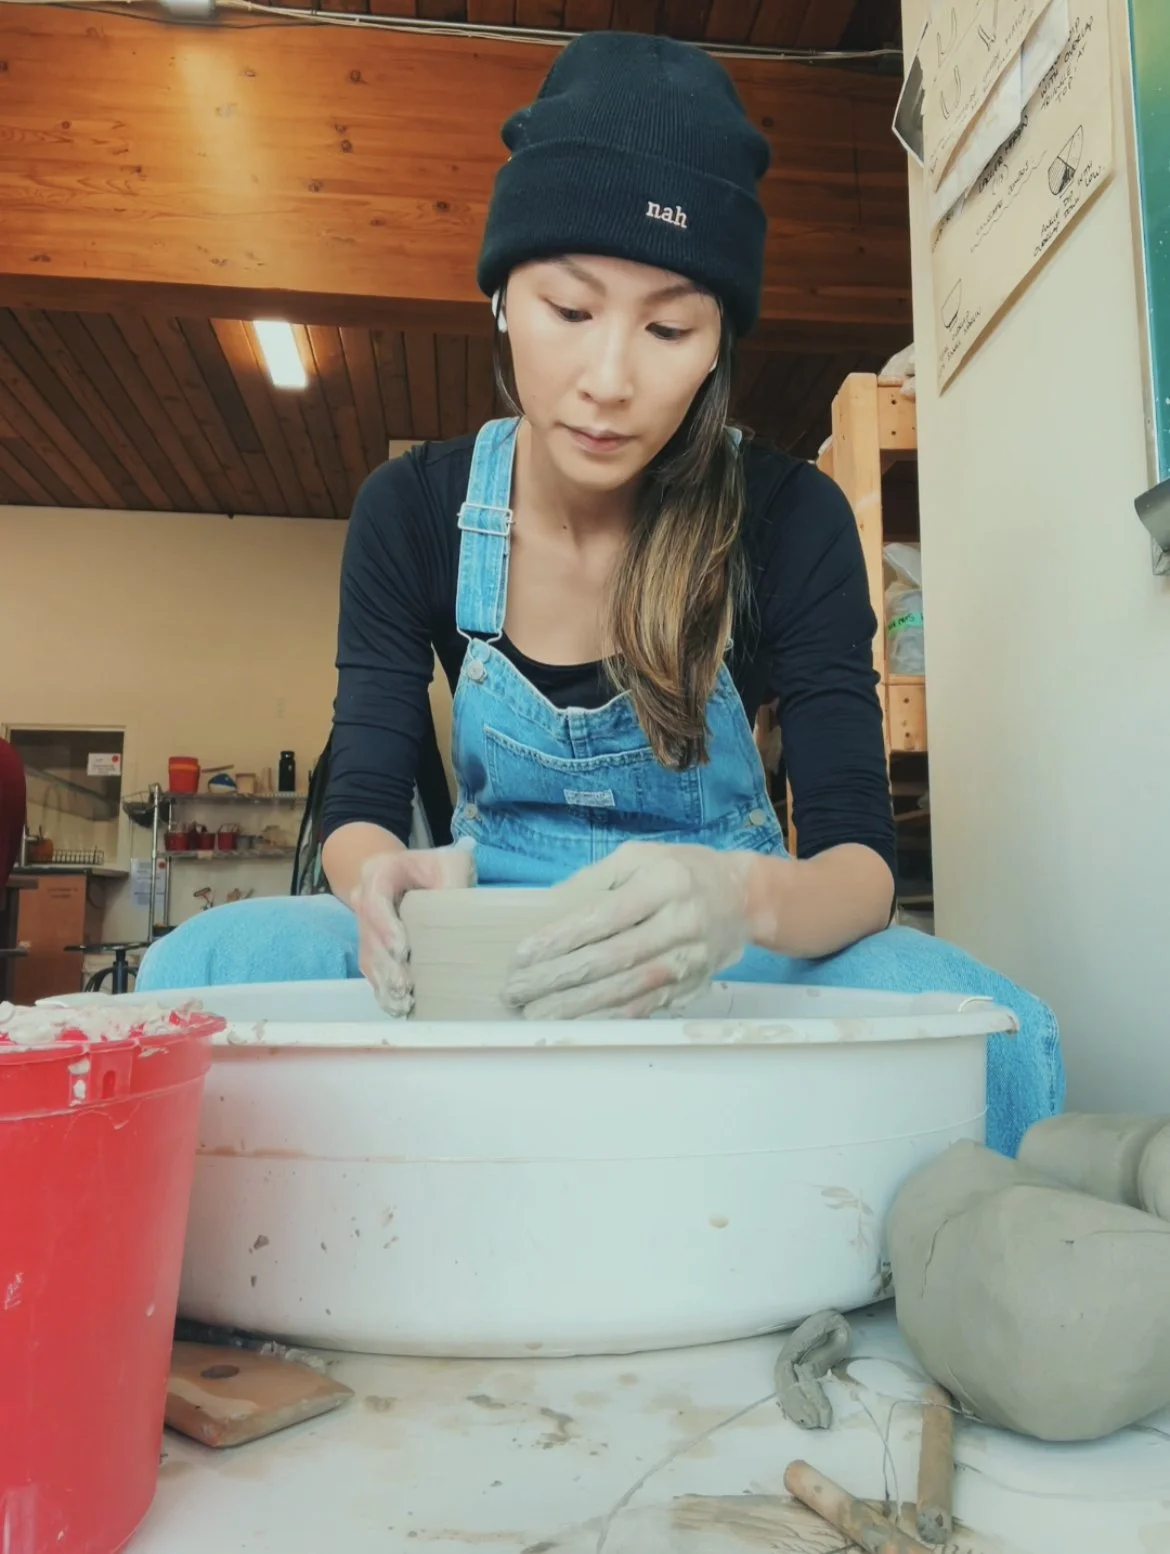
Putting in the work and trying to consistently get into practice. Vancouver is great because there are so many studios. It’s a bit harder in Toronto.
I went into the studio every Saturday and Sunday for 6 consecutive weeks to practice pulling up even walls. Again, again, and again. Practice makes almost perfect.
Technique notes: make the outside walls as neat as possible before pulling up and that makes it a bit easier. Use a sponge for first pull if you think you’ll really struggle. Keep wheel at moderate speed—too slow increases risk of walls being uneven, but also don’t go too fast because you haven’t mastered this yet and everything just gets a little crazy.

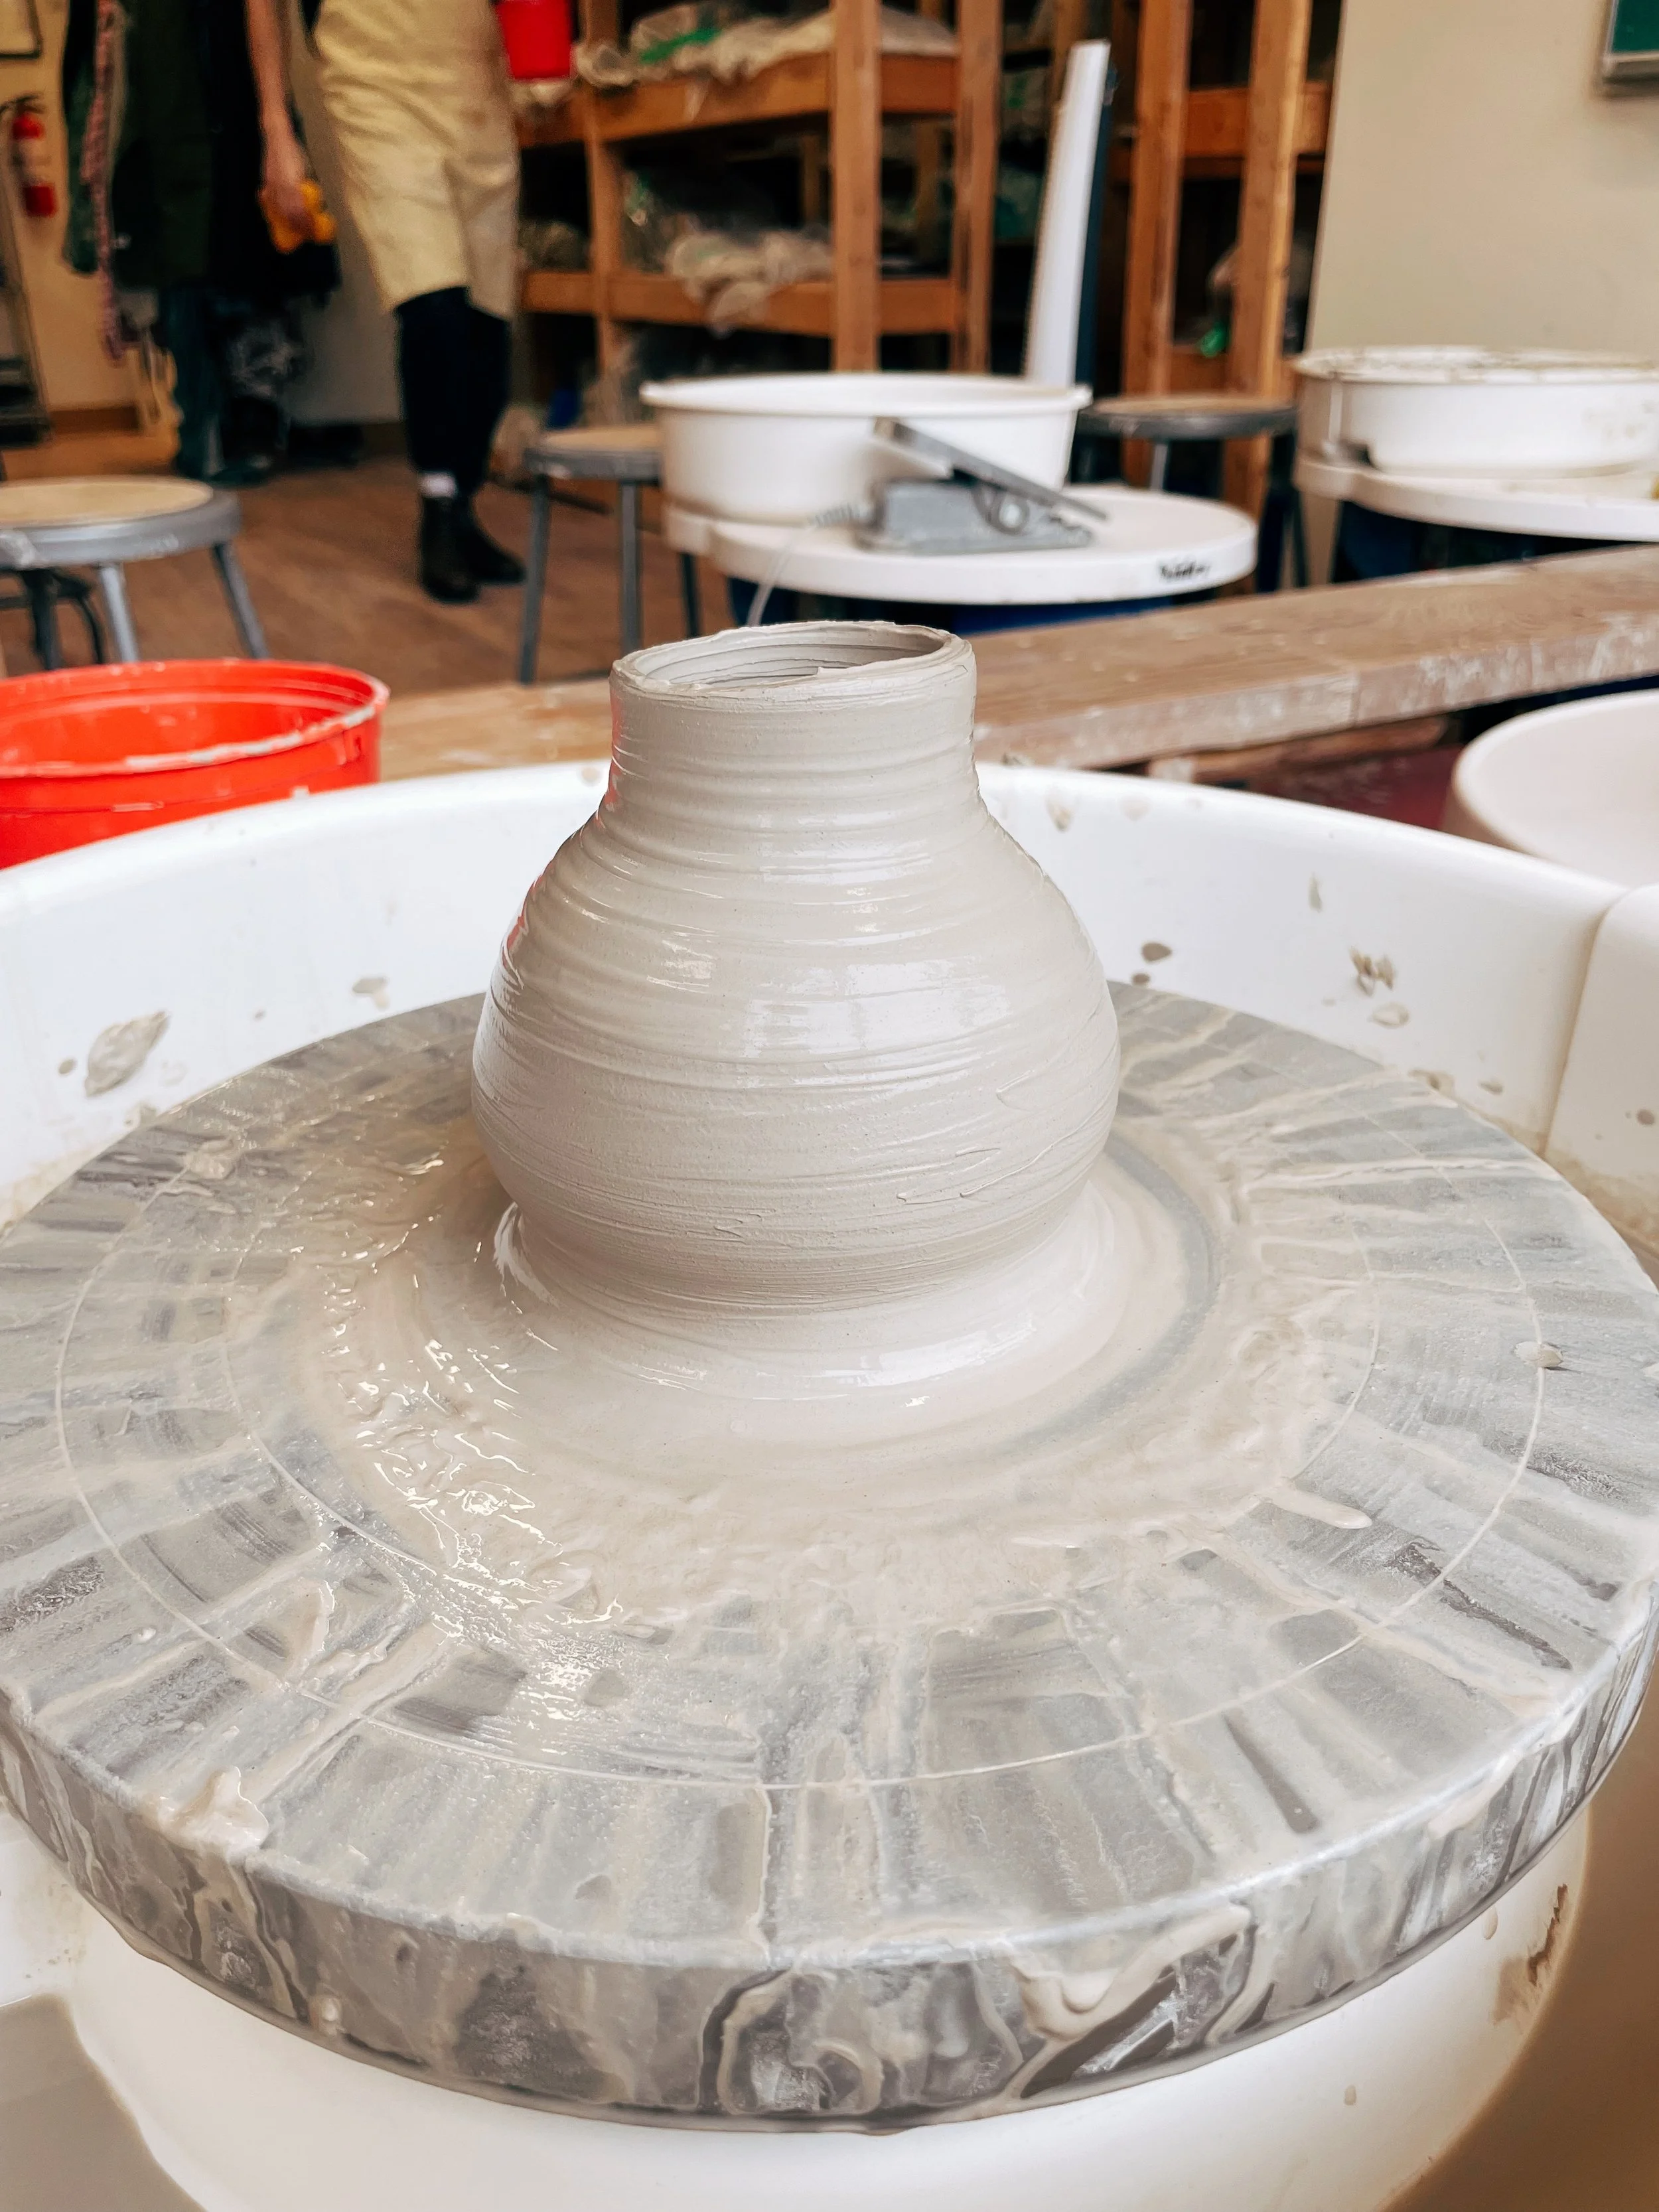
Mar 4, 2023—
Tried out a new shape today.
TIL it’s important how you cut the clay before removing it from the wheel. It makes the trimming process easier.
Luckily for me, I did a messy job when I was cutting it with the angled wooden knife tool. Need to figure out how to wield that thing. Why does it confuse me
Shape notes: a bit loppy at the bottom. Curves are not gradual enough. Bring it up a bit more so it’s a little more rounded.
Technique notes: Don’t linger too long in a singular area – that might be why it’s not even and maybe speed up the wheel more
Mar 7, 2023—
Remember to compress the damn clay. Geez.
It prevents ‘S’ cracks in the middle and makes the overall piece more durable.
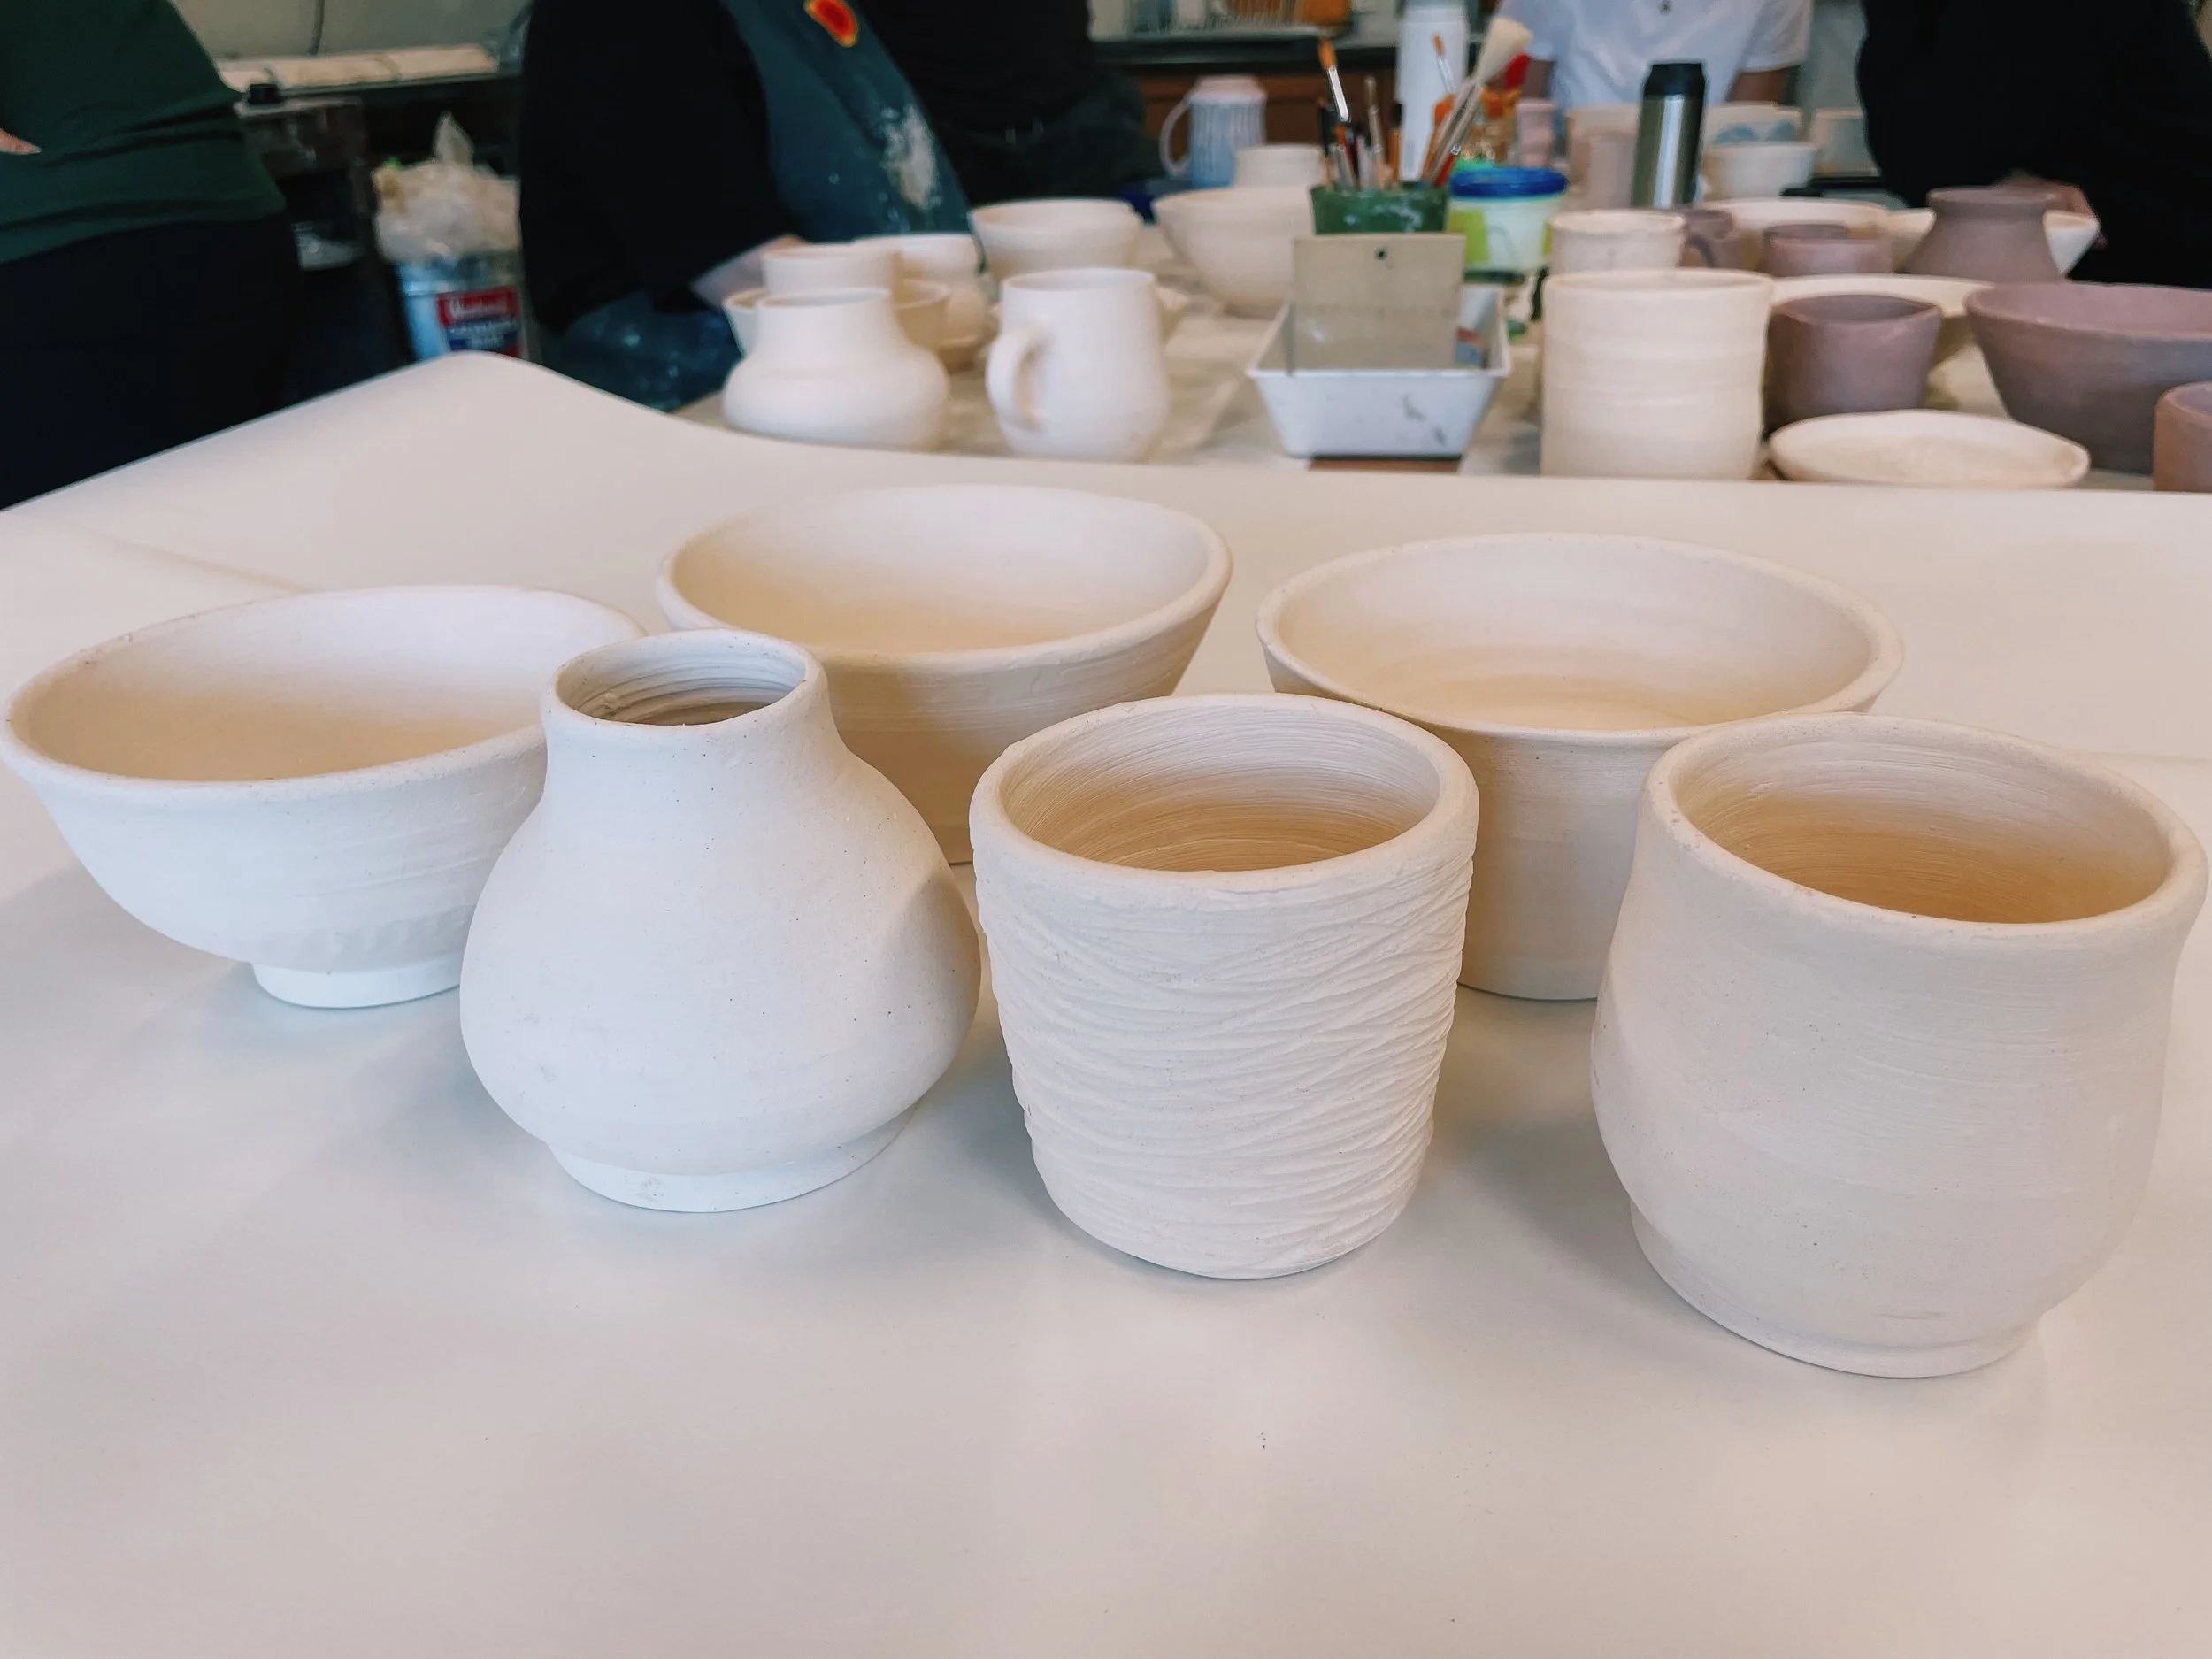
Mar 28, 2023—
Some pieces that just got bisque fired. Bisque firing transforms the object into a porous state for glazing and also reduces the chances that the piece will crack when glaze fired because the kiln is brought to temperature a lot more gradually during this stage.
Reminder: sand any areas down (wet sandpaper) and wipe with damp sponge before glazing.
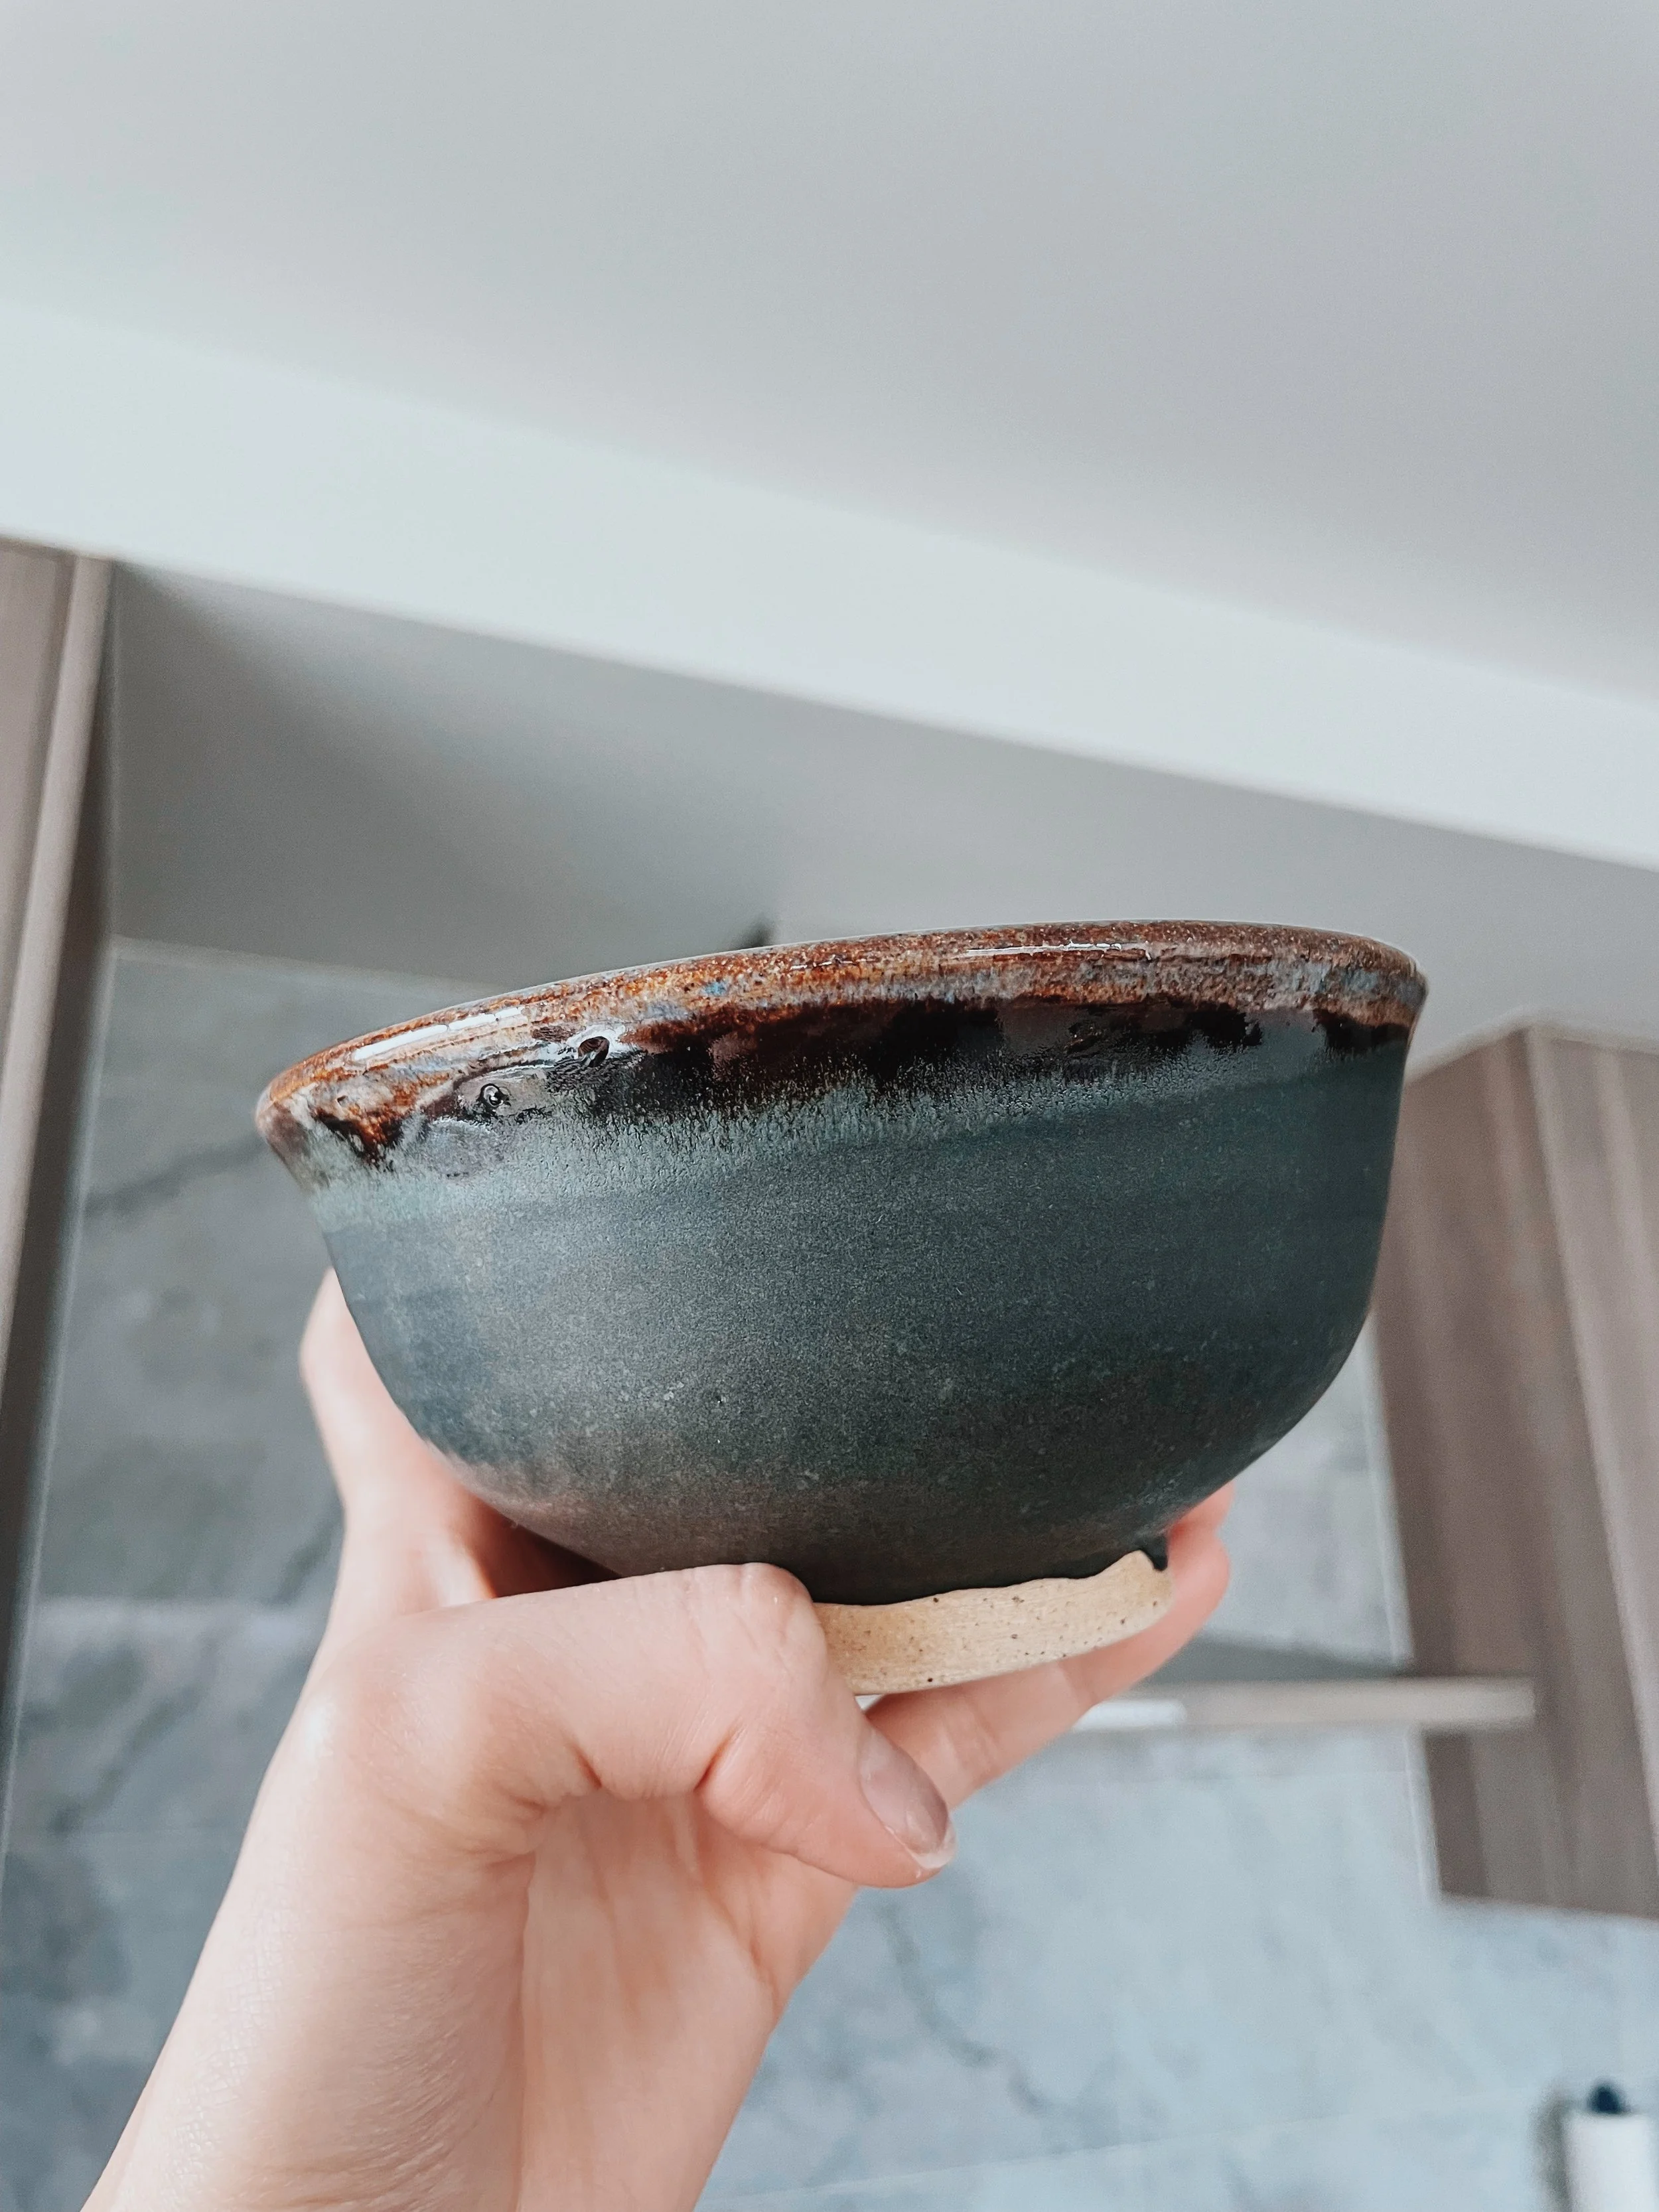
Mar 29, 2023—
Glazed and ready!
TIL there are 3 ways to add colour to your pieces. Slip is one way; however, it needs to be done on greenware (i.e. prior to bisque firing). Underglaze is also another option – this can be done before or after bisque firing. Glazes can only be applied after bisque firing.
To be honest, I never really know exactly how pieces are going to turn out because the initial glaze looks so different from the final product.
JUST TRUST THE PROCESS.

Apr 7, 2023—
Ice ice baby.

Collab pieces

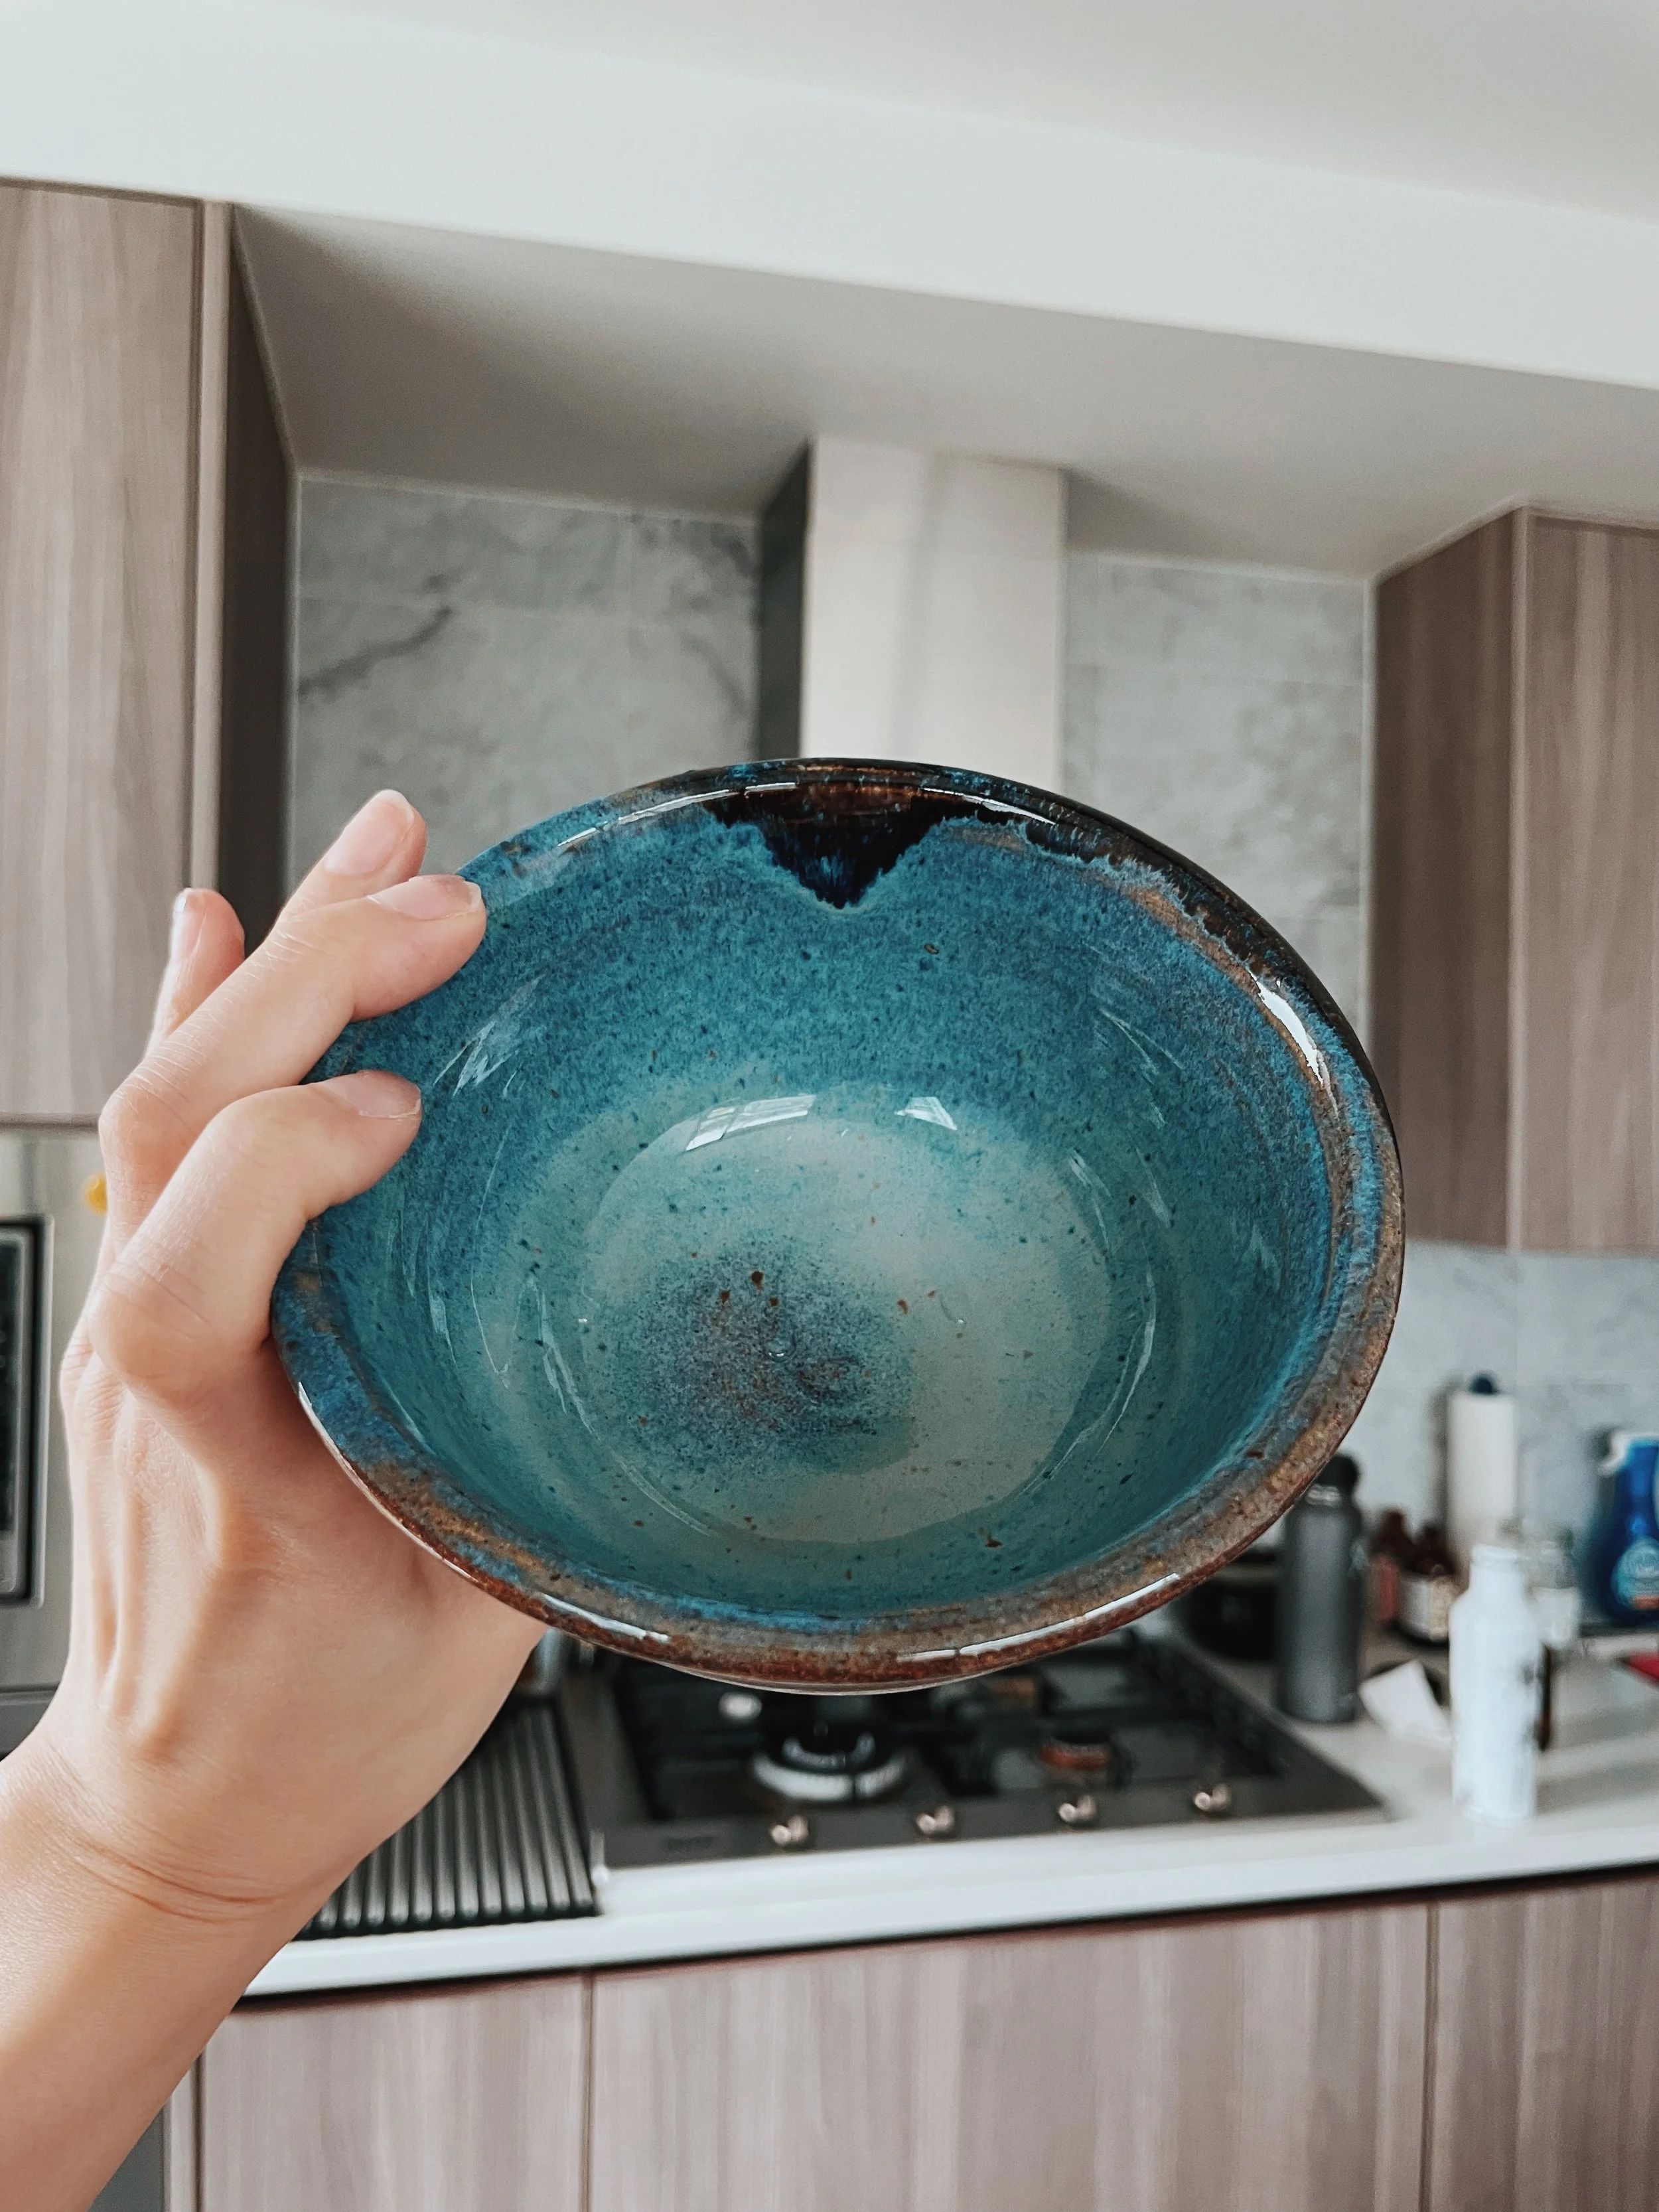
Ok wow wow wow. I am in so love with this matte black glaze!
A bit of a a glazing boo boo
May 7, 2023—
Learned how to do closed forms with a wooden chopstick. Wild~
-
Create a cylinder. Don’t make the walls as thin as I usually do.
Collar closer.
Start pulling to close.
Collar, and COMPRESS!!
Use chopstick to guide that last little bit to close
Use end of wooden chopstick to cut into clay for lid shape. Try to cut halfway into the estimated width of the walls
Cut the lid with an exacto knife once leather hard
Jun 13, 2023—
First time throwing a larger piece on a bat. You have to screw the bat pins into the holes on the wheel to keep it in place. It’s useful for throwing larger forms because you can lift the entire piece off the wheel without disrupting the form. I believe this one was a plastic bat, so I had to wire off the piece (but without removing the piece from the bat). Plastic is nonporous so it doesn’t release from the clay as easily.
I tried to make a ramen bowl. I think I used about 5 lbs of clay (the most I’ve worked with to date – yay!).
Starting to kind of figure out how to wield that angled wooden knife.
Throwing notes: keep left hand perpendicular when centering larger balls of clay. Sitting on a slight angle to readjust for this position seems to work for you. Keep left arm connected to your body for extra stability.
Drying notes: put some paper at the top to help larger forms with openings like to hold its shape while it dries to leather hard stage

Jul 27, 2023—
Thursday night gettin down right and dirty.
Played around with some black clay. It’s softer and moves more easily compared to the white speckled clay I usually to use. One of the girls at the studio mentioned she saw major shrinkage after it was fired. Let’s see how this goes. My noodle bowl might just turn into a rice bowl.
Throwing notes: Can pull up more of the clay at the bottom— use it to create a bigger piece, and ALSO, less to trim.

Aug 21, 2023
The jelly cup!
TIL you can fire piece twice. This sometimes causes the glaze to run more